 |
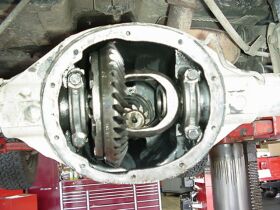
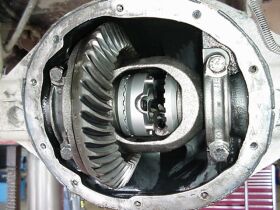
This is a picture of the empty Dana 35c carrier. That empty space in the center will soon be filled with pure wheelin' goodness. During this time I was sweating about whether or not I had ordered for the correct application. Some Dana 35c carriers are ABS compatible carriers and some are not. This can make it hairy when ordering a locker, because in many cases ABS carriers are not necessarily specific to certain model years. Fortunately, I was informed that all Dana 35c TJs have ABS compatible carriers, and my mind was at ease because that is what we had ordered. |
 |
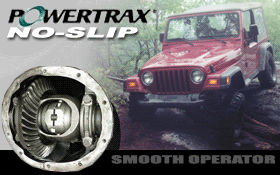
Powertrax No-Slip,
Dana35c, ABS carrier (all non-44 TJ) Keep in mind, if you've never purchased a spider gear replacement locker before, that just because your Jeep isn't equipped with ABS doesn't mean your rear axle doesn't have ABS common hardware. |
 |
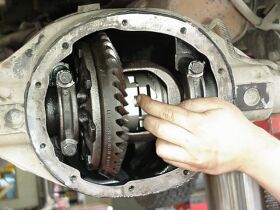
In this picture, Jeremy, my technician, started inserting parts of the locker as the provided instructions described. For the most part, you will be assembling the locker as you insert it into the carrier... piece by piece. At one point we were unsure if the thrust washers located on the outside of the original side gears was to be reinstalled with the locker or not. After trying to reinstall the locker with the thrust washers in place, and failing miserably, we established that they were to be left uninstalled. |
 |
The Powertrax No-Slip documention confirmed our theory as it reads, "The Powertrax No-Slip Traction System obsoletes any friction clutches and related parts that may also accompany the spider and side gears." In the picture to the left, you can see two installed couplers on either side, and one of the drivers is installed. |
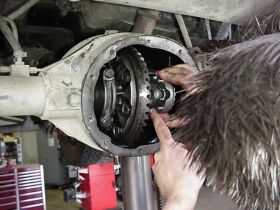 |
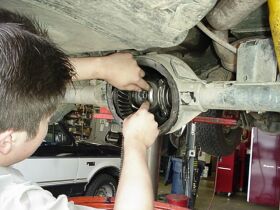
Jeremy carefully inserts the opposite driver into the locker assembly within the carrier. Notice the stylin' haircut. It is not necessary to have a technician this trendy to install a locker into a rear axle. :-) |
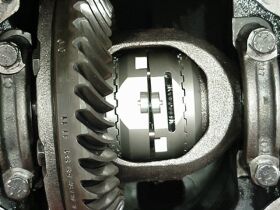 |
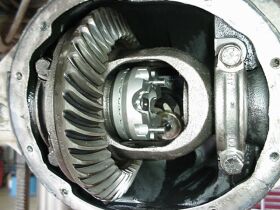
Here is the near-complete Powertrax No-Slip locker assembly. Lock Right installation veterens should take notice of small holes located in the pinion shaft seat on each driver. Eight small saddle springs (4 on each side) get inserted into these holes before assembly. This is not a characteristic that is common to the Lockright locker, and one can easily finish up with extra parts if they aren't paying attention. |
 |
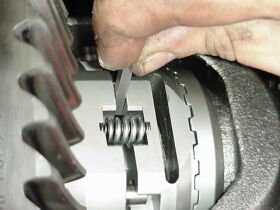
As opposed to a Lock Right unit, the springs that get inserted between the drivers are extremely rigid. Although they were approximately half an inch long, I could hardly compress them between my fingers. You can see in this picture, and the picture below, one narrow spring gets seated inside a larger-diameter and shorter spring. |
 |
Once you have completed assembling the unit, you want to check the tolerance of the space between the two drivers with the block provided by Powertrax. If the narrow side of the block fits inside, and the long side of the block doesn't, you are ready to go. This is done to test the installation and to make sure the assigned space within the carrier is of the right tolerance. |