 |
We raised the GTSP1 up under the TJ and trial fitted it. It was a close fit. We needed to shift it back and forth a little to get all the studs to line up with all the elongated holes in the skid plate. It is noted in the instructions that the forward passenger leg might need to be bent back slightly to achieve a better fit. I brought the skidplate back down, and smacked the leg three times with a large rubber mallet, and it was bent ever-so-slightly. When we raised it back into position, it fit even better. While you may not need to bend this leg, you probably should. It works better, and is safer than forcing the skid plate onto the studs. |
 |
After making sure that the new gas skid will fit under the Jeep, you can disconnect the straps on the old gas tank skid. The straps are bolted to the stock skid via two studs on one side. The straps are held into slots on the other side. When the straps are disconnected, carefully remove them. Pay attention to the placement of the hoses and wires coming out of the gas tank for when you swap the skids. |
 |
With the straps disconnected, the gas tank should lift right out of the stock skid pan. If you didn't have a full tank of gas when you started, it should be very easy to pick up and place into the Kilby GTSP1. Carefully re-use the straps that came off the old skid plate, on the new heavy duty skid plate. They should go on the new skid as easily as they came off the old one. |
 |
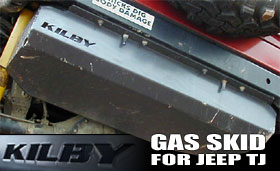
Here is a picture of the gas tank strapped down to the inside of the new gas tank skid plate. The old stock skid, looked like a worthless piece of metal when we were done. It was scratched up, dented, moldy, and dirty... and it went right out to the trash where it belonged! |
 |
Now the process of reinstalling the gas tank is nearly as easy as it was to remove. You will need your friend again. He or she will need to guide the filler hose up into the Jeep tub to the filler hole. It was a little snug in there, but not a difficult task. Once the tank/skid assembly is in place, the next step is to go around and get all of the nuts started on the studs. |
 |
Pictured to the left, is the skid plate leg that we bent ever-so-slighly with the rubber mallet. You can tell that it was bent a little because of the shadow that runs across it. I estimate that the leg was bent back around 1-degree. This is the most difficult leg to reach. One will most likely need to tighten this nut with an open-end wrench, or a ratchet with a long extension. |
|
Help spread the ROCKCRAWLER world!
|