|
|
|||
|
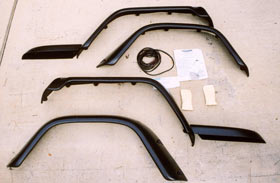
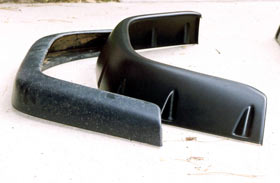
Wider tires, bigger lifts, new parts... It seems like it's a never-ending cycle. Once you modify one thing, either you discover the next weak link or even something you may not have thought of - like how much mud is going to come flying past your stock flares! One of the things I have often considered running were wider fenders flares, so when I was asked to take a look at Bushwacker's New Pocket Flares, it seemed like a great match. When the box arrived, I immediately opened it up and pulled out all the parts. 4 flares, 2 rolls of adhesive-backed rubber material, two packets of screws, plastic washers and trim caps (in Chrome and Black) and 1 page of instructions with very little detail. But then again, installing flares shouldn't be too difficult. I mean, it's got to be pretty simple, right? Well ,to answer my own question - yes it is simple. But clearer instructions and better parts do help. Read on to find out what I mean. One of the first things you will notice about the Bushwacker Pocket Flares is that they are made out of a thinner injection molded material, rather then a thick rubber-like material like some other companies use. The second thing is the how much larger they really are then the stock flares and also how they have a thinner profile and shape to them, as well. The nice thing about having a black Jeep is that almost everything comes in the color I want - basic black! So, since I wasn't planning on painting these flares, I was set to go. If you are planning on painting your flares, take the time to do it right. Painting your flares:
|
|||
|
Help spread the ROCKCRAWLER world!
|


