|
BesTop
Fender Flares
One of the first
things I did to the TJ was install a lift and add larger and wider
tires. The new tires would fit on the factory rims, but with the
additional width of the new tires they would rub on the frame. To
make the tires fit, I got rims with less backspacing than the factory
rims. The difference in the backspacing, and just the plain fact
that the tires were wider made them stick out past the factory flares
a few inches.
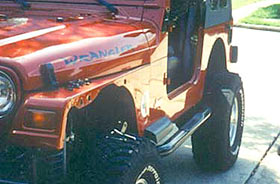
With the tires
sticking out past the flares it was impossible to keep the Jeep
clean. I know, Jeeps are meant to get dirty. But when I'm not out
on a trail and just cruising the streets I like my rig to look good.
Besides slinging stuff on my rig, the exposed tire can also toss
debris at other motorists, which is not a good thing. After looking
at what options I had with aftermarket flares I decided on the new
offerings from Bestop.
|
The first
step is to remove the factory flares and rocker panel extensions.
This is an easy process, as the bolts and plastic backing
nuts are easily removed.
Before
taking off the front flares, disconnect the side marker light
wire and remove the side marker light assembly.
Once the
old flares are off, it's a good idea to clean the surface
where the old flares were mounted.
|
The new flares don't have the holes punched out, but have
indentations where the bolts go.
The BesTop
instructions state to use a punch to open the holes. By trial
and error, I found it easier to use a drill bit that was the
same size as the indentation and open the hole completely.
The overall
fit of the flare is good, but just poking a small hole in
the indentations with a punch resulted in not being able to
get some of the bolts in.
Once you
have all the holes opened up, use the supplied hardware to
bolt the new flares on.
Loosely
install all of the mounting hardware. Once al of the bolts
are in, go back and tighten everything up.
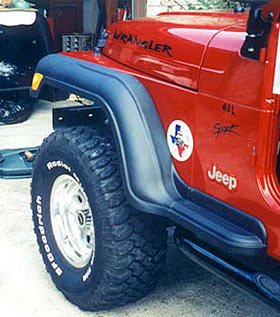
As you
can see in this photo, the new flares are a lot wider than
the factory flares
The factory
flares are about 4" wide. The bestop flares vary from 6 1/4
to over 7" wide. The 7" width is at the lower rear of the
front flare, Bestop call this a mud bulge which helps to keep
mud from slinging up on the driver.
|
| |
|
|

When installing the rear flare, you have to deal with the
inner fender panel. You have two choices. Either remove the
panel or push it up out of the way to get to the backing nuts.
I opted
for the second method and just pushed the liner out of the
way as I installed each bolt and nut.
|
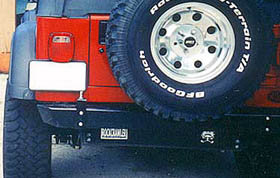
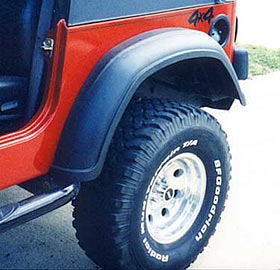
The flares are about 2 1/2 inches wider than the OEM flare.
This extra width almost completely covers the tires. This
helps keep the Jeep clean when off road.
In addition,
many states have fender flare laws that require complete coverage
to the edge of the tires, so these BesTops would keep you
in compliance with those laws.
|
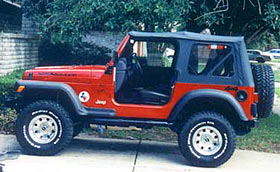 As
you can see in these photos, the new flares cover the tires and
look good, too, unlike some of the other aftermarket flares I have
seen. The BesTop flares have internal ribbing for added strength.
The flares also have texture similar to the factory flares, and
are more rounded, which I think adds to the appearance. As
you can see in these photos, the new flares cover the tires and
look good, too, unlike some of the other aftermarket flares I have
seen. The BesTop flares have internal ribbing for added strength.
The flares also have texture similar to the factory flares, and
are more rounded, which I think adds to the appearance.
I was very pleased
with the quality of the flares. After seeing the finished look,
I'm glad I decided to go with the BesTop kit over the other aftermarket
offerings.
|