Back to Features Page Ray Woo installs the AirLift Rear Air Suspension By, Ray Woo |
|
|
AirLiftÛ
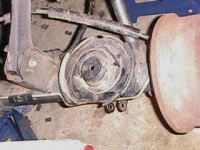
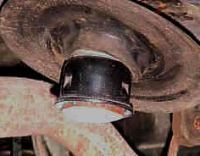
Rear Air Suspension First, raise the Jeep with jackstands placed under the frame. It is important to raise the vehicle high enough to allow the suspension to droop without touching the floor. Remove the rear wheels and disconnect the shocks at their lower mounts. Use a floorjack to raise the axle to its normal level, then disconnect the swaybar links from the axle by removing the lower connecting bolts. Then disconnect the track bar from the frame by removing the upper mounting bolt. Remove the jack and allow the axle to hang - just be sure that the rear brake lines are not stretched excessively. The coil spring can be removed by using your foot to push down on the brake drum, pushing the axle down and allowing the spring to be worked free by rotating and pulling outwards at the base of the spring. It may be helpful to have a spring compressor handy just in case you have problems (I bought a cheapo model for $20 at the local Western Auto Supply). The lower spring pad needs to be drilled to to allow the air line to pass into the airbag. AirLift's instructions call for a 3/8" hole, but I followed Four Wheeler's suggestion and drilled a 1/2" hole in the center of the pad before installing a rubber grommet to prevent excessive chafing. Be sure to place the hole in the center of the spring pad to prevent possible binding.
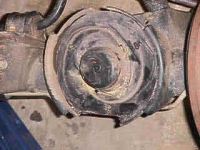
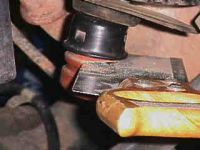
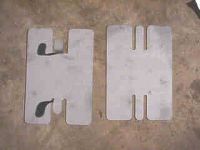
Note the 1 x 4" piece that was removed from the rear of the pad. Lifted TJ's equipped with the optional Dana 44 rear axle tend to pinch the shock absorber canister against the back of the lower spring pad at full droop. Unfortunately, Rancho does not recommend mounting their 9000 series shocks upside down, so short of repositioning the shock mounts this is the best possible solution. Saw the rubber bumpstop flush with the level of it's retaining cup. This is the contact surface against the top of the bag, so make it as smooth as possible. If you are working with an upgraded Teraflex 4" kit (like I did) and need to raise the empty height, you will need to first remove the bumpstop bumper and cup and reinstall the 1" aluminum spacer that originally came with the Teraflex 3" kit (you can see the bottom edge of it in the right-hand picture below). If you don't install a spacer then the bag will be unloaded at rest and will come into play only with inflation or added weight.
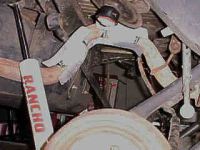
Heat shields have to be installed on the tailpipe to prevent the passenger side airbag and hose from melting. The kit supplies two malleable shields that are held onto the tailpipe with hose clamps. The tabs on each end of the shield are bent into two right angles, and these tabs are clamped against the tailpipe.
|
|