|
|
|||||||||||||||||||||||||
|
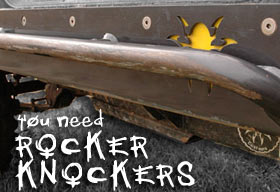
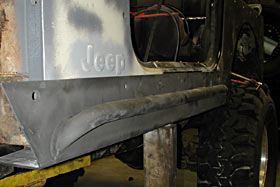
If you visit Rockcrawler.com often, you may remember over the summer I put a set of Poison Spyder Crusher Corners on my terribly abused CJ-7. My tub had been badly beaten, bashed, and was in the process of disintegrating due to all of the hidden rust under the paint. The corners provided me with a single solution to multiple issues - the most important of which was protection. The 3/16” plate is probably overkill, but I like it! Since it has been installed, I have beat them up pretty well and the only thing showing any ill effect is my nice new paint. For me, the Crusher Corners also allowed me to hide how badly rusted and beaten my stock tub had become.
The Saga Continues I considered building my own (more homebrew), but after a quick cost-benefit-analysis between the practically-bolt-on Rocker Knockers from Poison Spyder Customs and building my own (countless hours and numerous burns from the plasma torch), I quickly added Rocker Knockers to my order. When everything arrived I was immediately impressed. Rocker Knockers are made from the same 3/16 steel used to make Crusher Corners. Both use the same 3/8 stainless steel fastening hardware, as well. As advertised, the rockers arrived with no finish – just bare steel, so you can really see and appreciate the workmanship that goes into the product. The welds are beautiful, bends and brakes are clean, and of course cut-outs are laser perfect.
There are installation instructions on the PSC web site at www.spydercustoms.com that are excellent. However, since I like to do things the hard way, I opted to completely disregard the provided instructions. Fortunately, it would be pretty difficult to mess up the installation of the Rocker Knockers, so I really did not need them. The following are the steps I used to install the rockers. Although some of the steps I used are in a little different order from the directions (and slightly modified), either approach will work fine. Like I said, it’s hard to mess this up.
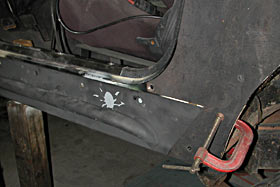
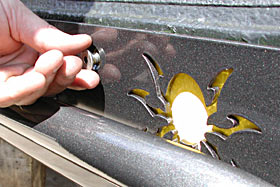
One of the nicest features of the Rocker Knockers is that there is a frame/body tie-in which enables you to later use the Rocker Knocker as a secure point to tie into for the front hoop of your roll cage. The frame/body tie-in requires that you loosen the body bolts (and remove one) before you can begin the test fit. There are five body mounts that run along each side of the tub and one centered in front of the clip – aka grille. You will need to loosen (do not remove) the ten body bolts along the sides of the Jeep. One of the body bolts (and body mount) will need to be completely removed so you can do a test fit. It’s pretty obvious which one to remove when you compare the rocker to the bottom of your Jeep. Now you are ready to do a test fit. I used a jack and piece of scrap wood to hold up the Rocker Knocker. Once I had everything placed and aligned I used a couple of clamps, in addition to the jack, to keep everything secure. For those of you with nice clean Jeeps, now is the moment of truth.
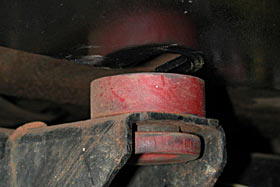
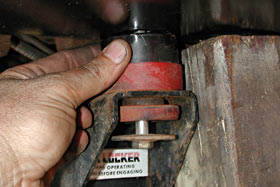
Remember the body mount and hardware you removed earlier? Since the Rocker Knocker is now a 3/16” spacer where the body mount used to be, you are going to need to modify the mount. If you have a body lift like me, you can simply modify the puck used in the body lift. Simply remove 3/16” of the material from the body mount or puck to compensate for the space now occupied by the Rocker Knocker. Believe it or not, this was one of the most difficult parts. My body lift uses aluminum pucks and if you have ever tried to use a grinding wheel on aluminum you know it’s more difficult than it sounds. In retrospect, it would have been easier to shave the rubber/poly body mount.
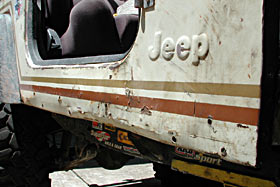
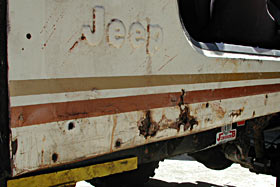
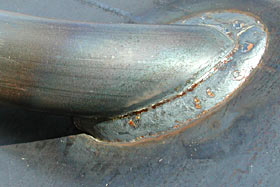
However, If you enjoy rockcrawling and you intend to use the Rocker Knockers as a slider or a pivot point while on the trail, save your money. Powder coating is not THAT rock hard and eventually you will scrape it off the bottom of the rocker. Go buy yourself a few rattle cans of your favorite color and start painting. Since you already have the paint out, now is a good time to go back to your Jeep and put a little paint in the holes you just drilled. You do not want any exposed metal or your rocker panes might look like mine after a few years (remember the photos at the beginning?). Once everything is dry it’s time to put it all back together.
|
|||||||||||||||||||||||||
|
Help spread the ROCKCRAWLER world!
Share on Facebook
|